

Find out here the most complete Dr.Fone guides to easily fix the problems on your mobile. Various iOS and Android solutions are both available on the Windows and Mac platforms. Download and try it now.
 Data Recovery (iOS)
  System Repair (iOS)

 Phone Backup (iOS)
  WhatsApp Transfer (iOS)
 - Transfer WhatsApp from iOS to Android/iOS
- Backup & Restore WhatsApp
- Backup & Restore Kik
- Backup & Restore Viber
- Backup & Restore LINE
- Backup & Restore WeChat
 Data Eraser (iOS)
  Screen Unlock (iOS)


Dr.Fone - Data Eraser (Android):
Video Guide: How to Permanently Wipe Android Device?
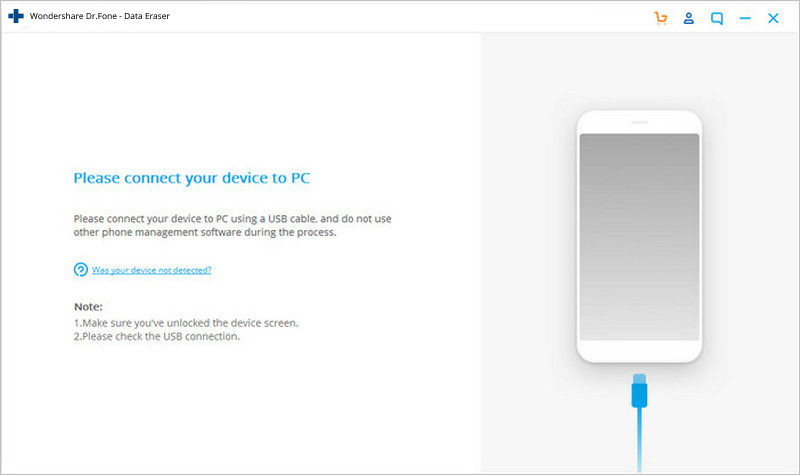
Step 1. Connect Your Android Phone
Launch Dr.Fone on your computer. Select "Data Eraser" among all the tools.

* Dr.Fone Mac version still has the old interface, but it does not affect the use of Dr.Fone function, we will update it as soon as possible.
Connect your Android phone to the computer using a USB cable. Make sure you have enabled USB debugging on your phone. If the Android os version is above 4.2.2, there will be a pop-up message on your phone asking you to allow USB debugging. Tap on "OK" to continue.
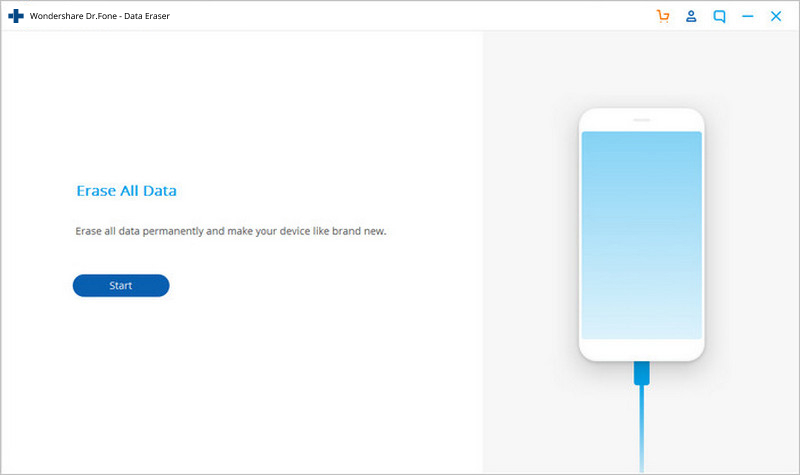
Step 2. Start Erasing Your Android Phone
Then Dr.Fone will automatically recognize and connect your Android device. Click on the "Erase All Data" button to start erasing all your data.
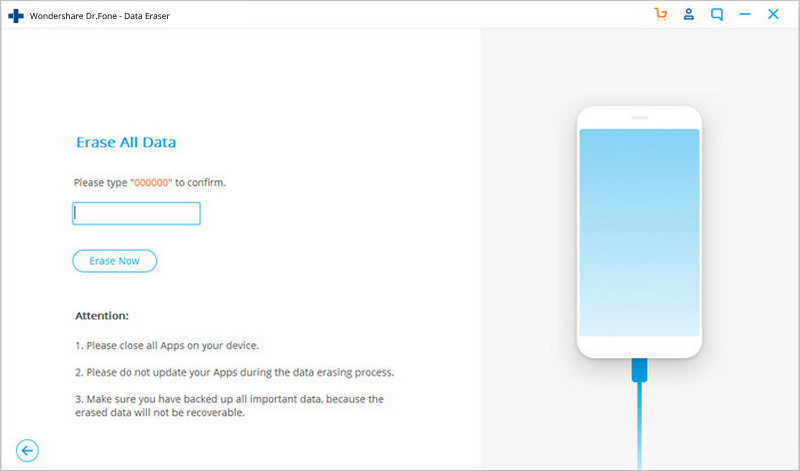
Since all the erased data are not recoverable, make sure you have backed-up all the needed data before you proceed. Then key in “000000” into the box to confirm your operation.
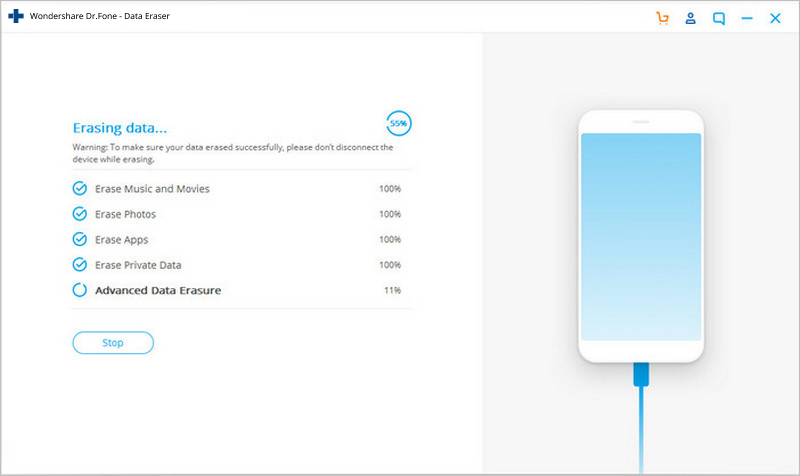
Then Dr.Fone will start erasing all data on your Android phone. The whole process takes only a few minutes. Please don't disconnect the phone or open any other phone management software on the computer.
Step 3. Perform Factory Data Reset on Your Phone
After all app data, photos, and all other private data have been completely erased, Dr.Fone will ask you to tap on Factory Data Reset or Erase All Data on the phone. This will help you completely wipe all the settings on the phone.
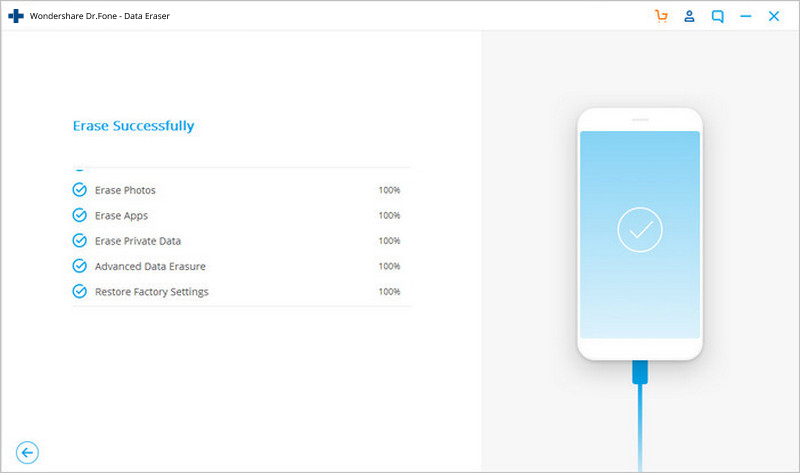
Now your Android phone has been completely wiped and it's like a brand new one.